Automatically translated from Dutch by AI. Read the original
Utility connections
Water, drainage and electrics from the garden office to the connections at the house.
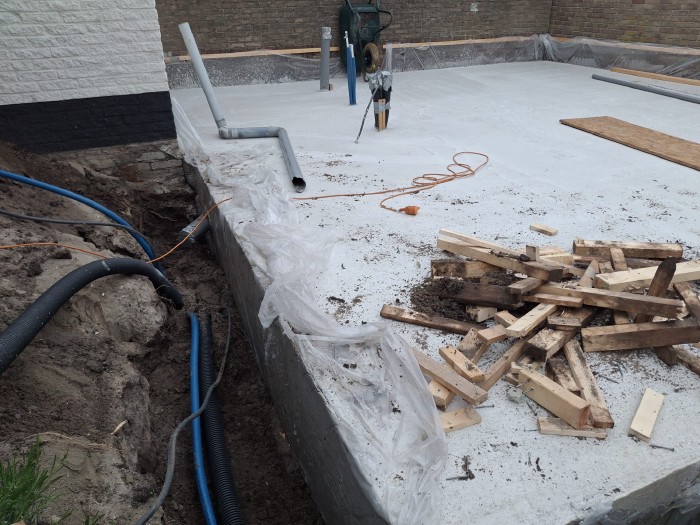
The last update before the build phases get planned with AI, which I’ll also go into in more depth here.
Preparation
A few Google searches tell you the minimum depths for all cables and pipes
- Electrics 60cm
- Water main 80cm
- Ducting 80cm (because you don’t know what you’ll want to pull through it later)
- Sewer 50cm
Rules/advice from Koen :
- Sewer at a 1% fall / 1cm per metre
- No more than 45 degrees per bend in the sewer
- Push-fit joints are nice to work with, because you don’t have to glue them
From the earlier renovation I knew what was where in the ground, and I also knew that the foul sewer and the rainwater drain aren’t separated yet. So that was really all the preparation I needed.
Fetching the materials
So I went off on my ’little bike’ to fetch sewer pipes (110 diameter) from the builders’ merchant two minutes from my house, and once again I was shocked by the prices. From the budget I knew what Hornbach charged, and the difference was almost twenty euros a pipe. Fetching my father’s trailer and driving 15 minutes to Tilburg kept seeming like too much hassle, but that threshold has dropped another few centimetres.
It feels like I’ve now spent two posts moaning about costs, but I promise it’ll get less. I set great store by a shop’s service and a product’s quality, but at the DIY stores I rarely get that feeling. I often don’t look at the price, and then later I find out yet again that I’ve paid far too much. I force myself to be sharper about it here, and it’s slowly starting to pay off. Especially when the evidence is just a Google search away, and in this case 228 euros could have been 128 euros. Add a few other slip-ups, like ordering too little foundation steel, and you’re at 1,000 euros before you know it.
I got the fittings from Hornbach and later also from Warmteservice Waalwijk . For a private customer Warmteservice is a few euros more expensive, but you walk in and they really know how to help you. I reckon it’s a pleasant place to do your shopping as a tradesman. The fittings looked worse, because the rubber seals were thinner and they weren’t made by Martens. Later I realised what nonsense that reasoning was. How would I know whether thick seals are good, or whether Martens is good? The latter is partly because we live 10 minutes from the Martens factory. A bit brand-conscious after all.
Digging to the house
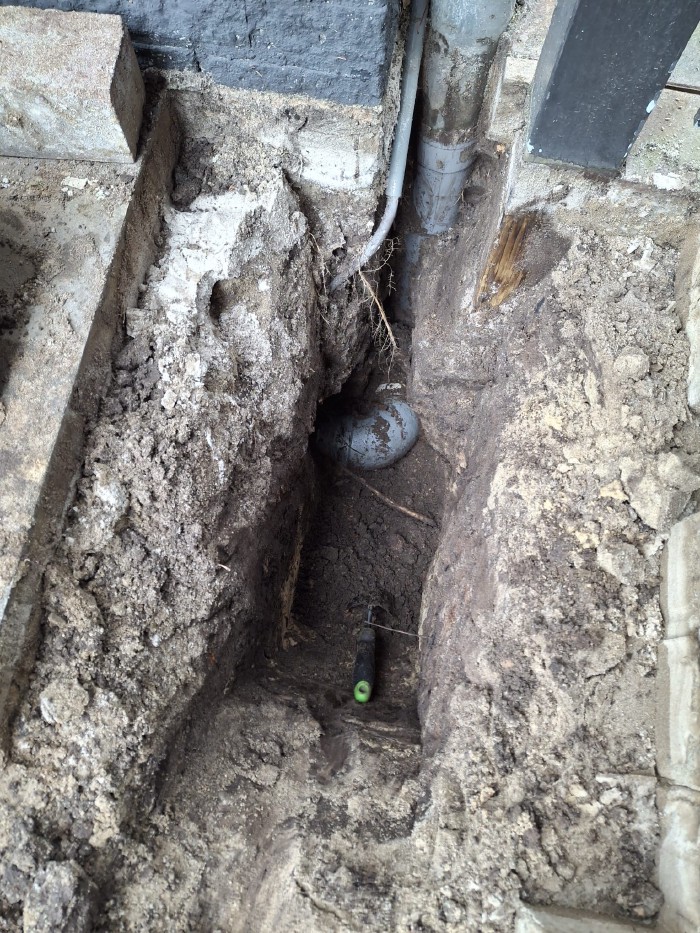
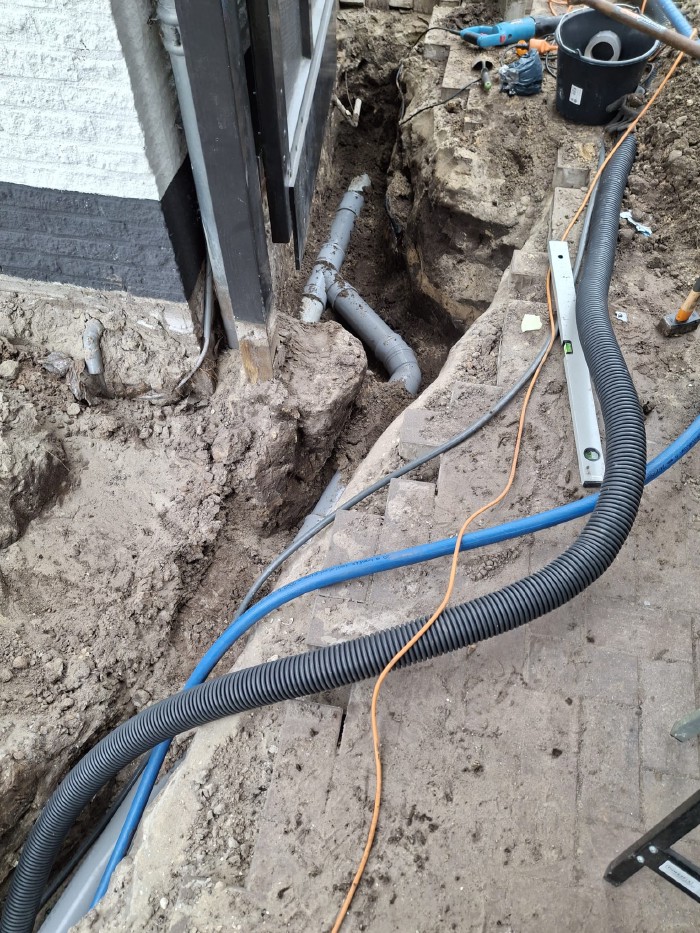
Because the sewer came out of the foundation fairly high up, I didn’t start calculating the fall but first went digging at the corner of the house. That’s where the rainwater drain from an extension goes round the corner, and shortly after that the kitchen is connected to it. The plan was to turn the corner piece into a T junction, but I soon knew that wasn’t going to work. It may not be easy to see in the photo, but the bend hugs the corner of the house very tightly and a post from the canopy stands right next to it. That changed the angle of my not-yet-dug trench considerably, so I was quite pleased about that. I had to connect further ‘down the drain’.
The digging could get going again, and this time a trench 80cm deep. I laid all the utilities except the sewer in it, and with a few heaps of sand on top it was done in no time. The ducting also acted as a spacer, so that electrics and water didn’t lie directly against each other. Normally electrics sit higher, but the spacer and the sandy soil meant I thought it was fine like this. During the preparations I’d heard several people say that water doesn’t really stand in sandy soil.
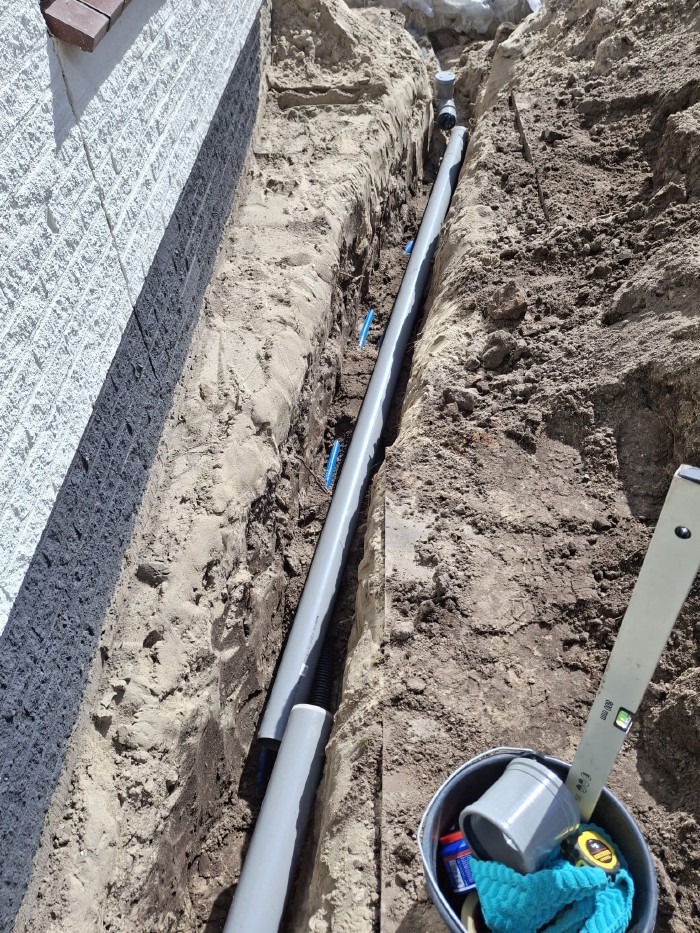
Now it was the drain’s turn. From the garden office, the rainwater drain from the garage/garden office, and an inspection cap. I thought of that last one in Hornbach, because at the very end of your drain it might come in handy some day. Because of course I’d already taken a few knocks making the drain in the foundation, this went without too many problems. The only sore point was getting a fitting with a push-fit seal back off. I’d made a mistake and could barely get the fitting off. You know how it goes; you pull and it won’t budge, you pull harder and it won’t budge, you pull with all your might and it still won’t budge. Some Vaseline from the seals gets on your hands and you slip off, which is then the last straw that sends you off to …. have a cup of coffee. In the end it works after all, by holding the fitting in place with a piece of wood.
With a single 45-degree bend I was mostly heading in the right direction for the connection point. With a bit of play in the pipes it was all going to work out. Exactly as Koen had told me. I joined the pipes together and fixed them with enough fall using a few heaps of soil every 2 metres. Purely so I could still easily put right any mistakes.
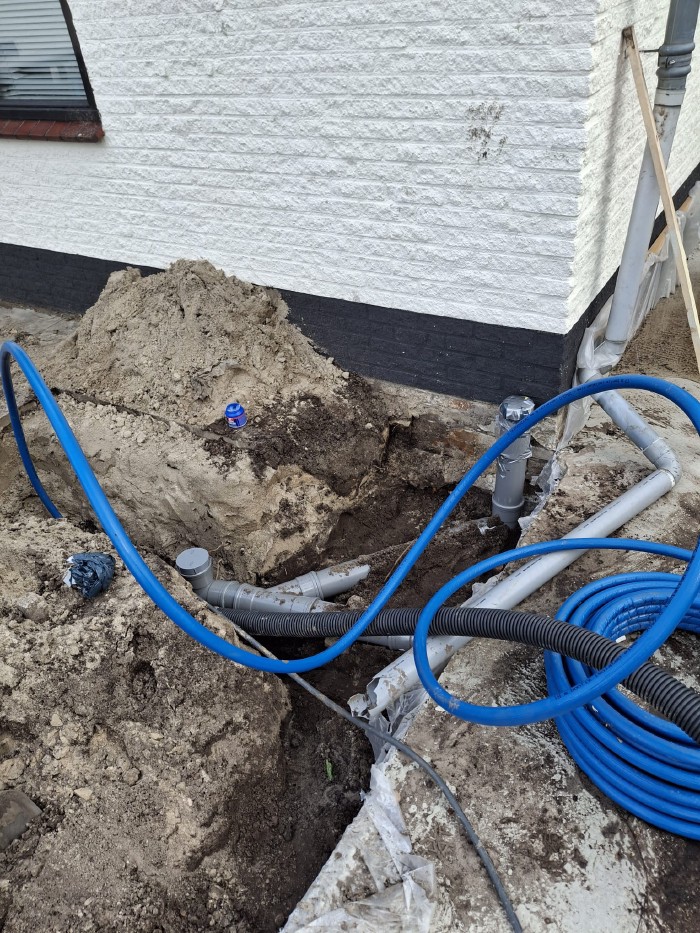
Connecting to the existing pipe
With my father’s reciprocating saw I cut through the existing pipe, and here too I’d made a mistake connecting a fitting. You can very easily put a fitting back in with slip couplers, but the ones from Hornbach don’t really cooperate. Rain was falling, water was running out of the pipe, it just wouldn’t work, and I was pretty fed up again. Slip coupler thrown away, and by chance grabbed the spare from Warmteservice. That one did work perfectly.
Afterwards I did have to laugh to myself, because all through that fiddling with the fittings I kept thinking: ’that *$@ Koen can say what he likes about push-fit joints, but gluing worked fine’. Turns out he was right after all, but gluing wasn’t wrong either.
Digging to the water meter pit and the meter cupboard
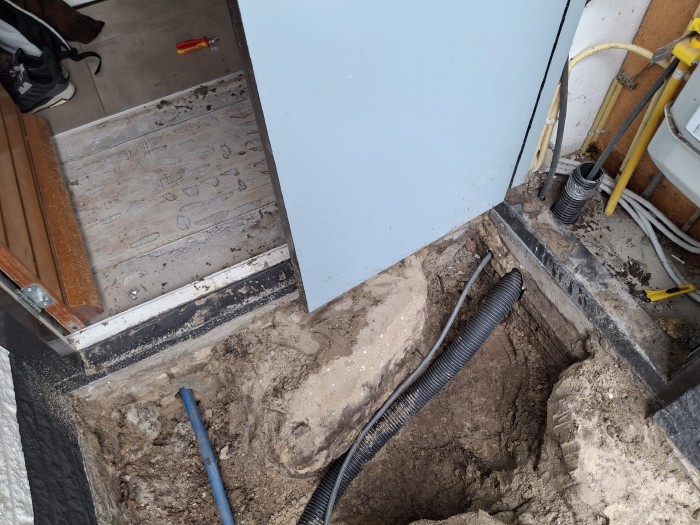
With the drain connected to the existing drain, it was now the turn of the other utilities. In the previous photo you can see that just before the house they step up above the drain. Now it was 15 metres of digging to the water meter pit and the meter cupboard. Another corner and a small tunnel under some cotoneaster, but otherwise nothing much to report. Once there, I had to drill and feed the utilities through. I knew Koen had a diamond core drill, but he’d rather not just lend it out. I knew my father had plenty of masonry bits available, but when I rang him he pushed back quite a bit. I just wanted to drill a few holes and chisel out the rest, but my father kept banging on about drilling it neatly. He only just stopped short of saying: you’re not getting my bits for that. With that message I then rang Koen, and he pretty much agreed. So I asked him straight away whether he might be able to come round for the paving and the drilling. Of course none of that was ideal, because everything was dug up, so as a rare exception I was allowed to borrow his diamond core drill and could carry straight on. Brilliant!
I’d held a big masonry drill before, but this was quite a bit bigger, a machine you also have to hook up to the water. I was advised to make a jig for awkward angles so you can guide it along that, and above all to let it do the drilling itself (don’t push). For convenience I started with the vertical hole in the meter cupboard, and that went really well. For that reason I left out the jig for the horizontal (slightly angled upwards) holes, and those went without too much trouble either. Feeding the connections through was a bit of a faff, but that was done fairly quickly too.
Backfilled and done
Once everything was in, I threw part of the soil back in and gave it a good soaking several times. It’s little effort and it means the ground doesn’t settle as much afterwards. It still settles a bit, and I never stop being amazed at how soil also magically disappears once it’s back in. There always seem to be a few centimetres missing. I suppose some of it blows away and goes inside under my shoes, because staying behind on the paving isn’t an option. My wife is ’the most amazing’ sweeper. Give her a broom and she’s completely in her element.
I’m half joking about it now, but she’s genuinely very good at it and she finds it relaxing. She spent her whole childhood working at a riding school and I think she still has calluses on her hands from all that hard work. She complements me well there, because it isn’t my favourite job.
A week later Koen came round and relaid the paving. He has the right tools and the experience to put it back in a couple of hours. I can’t match that.